How to Get an OpenRouter API Key: A Step-by-Step Guide
On this page
In this guide, you'll learn how to get your OpenRouter API key. You'll create an OpenRouter account, generate your key, and make your first API call. We'll also show you a simpler alternative if you want access to hundreds of AI models without managing API keys or billing.
Prerequisites
- An email, GitHub, or Google account for signing up
- Basic familiarity with code (we'll show simple examples)
Step 1: Create Your OpenRouter Account
Go to openrouter.ai. You'll see the homepage. Click Sign up and create your account using your email, GitHub, or Google account.
Once you've signed up, you'll see the Get API Key button on the home screen.
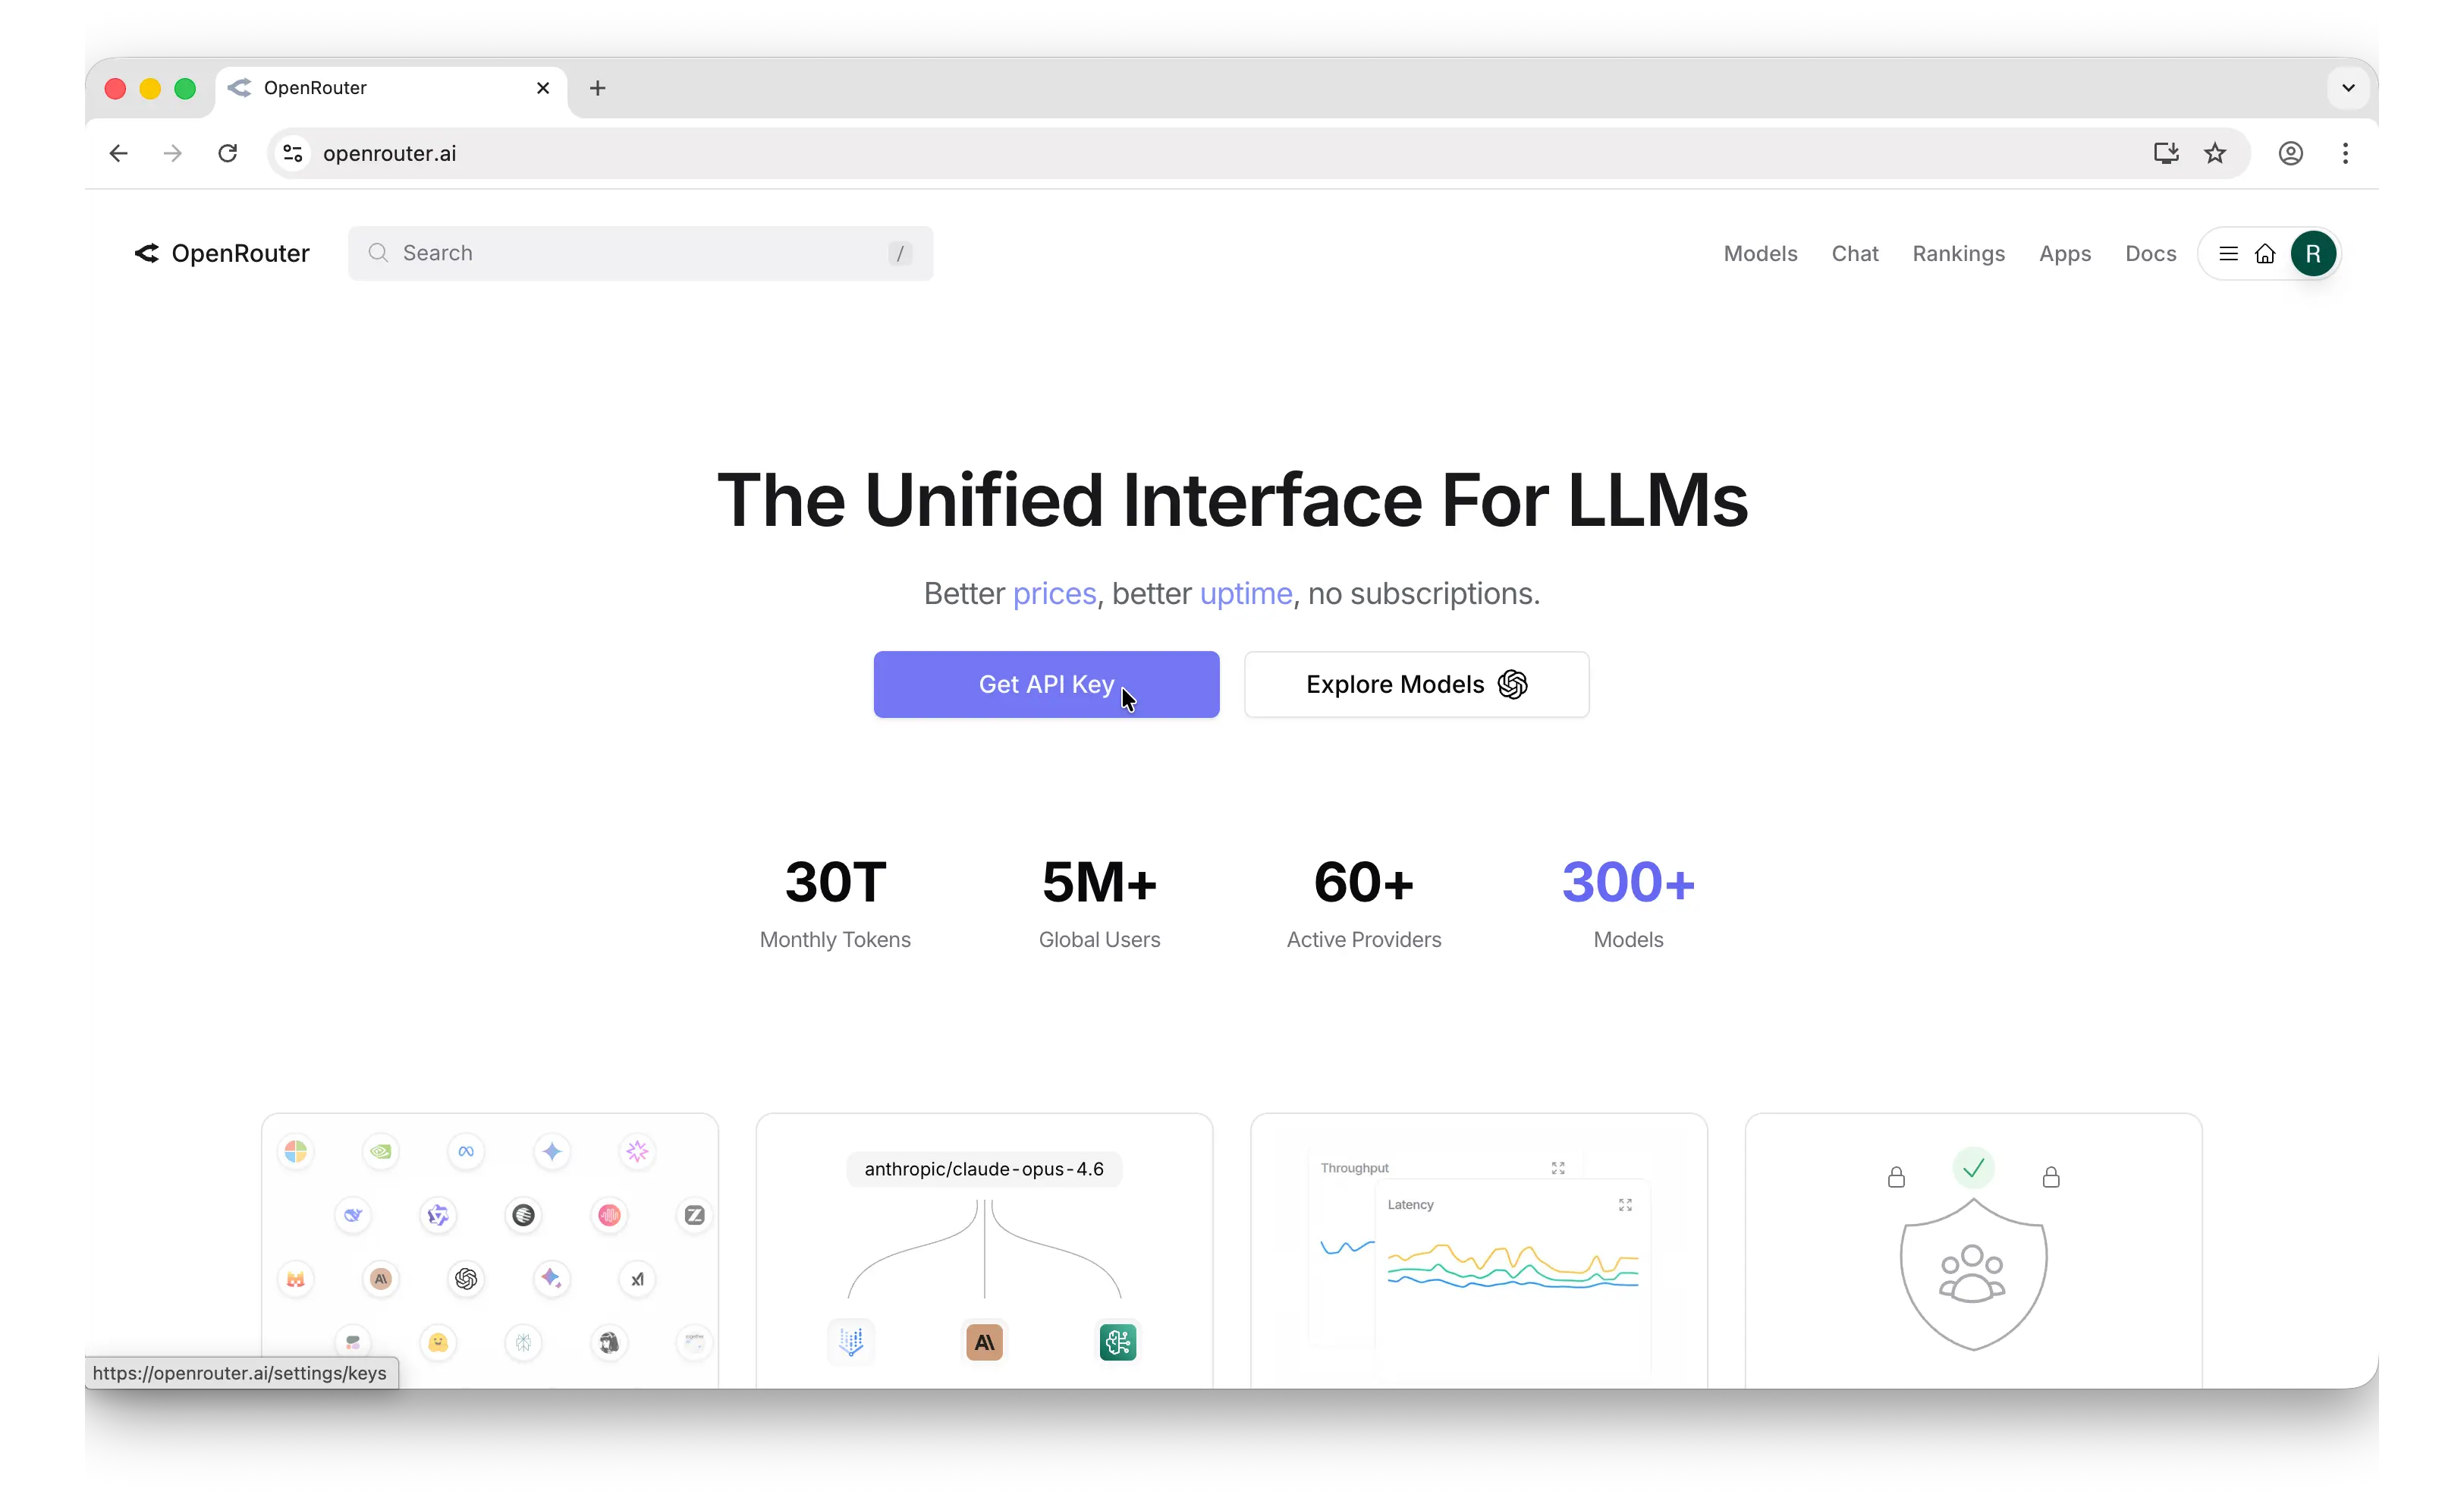
Click that to go to the API key management page.
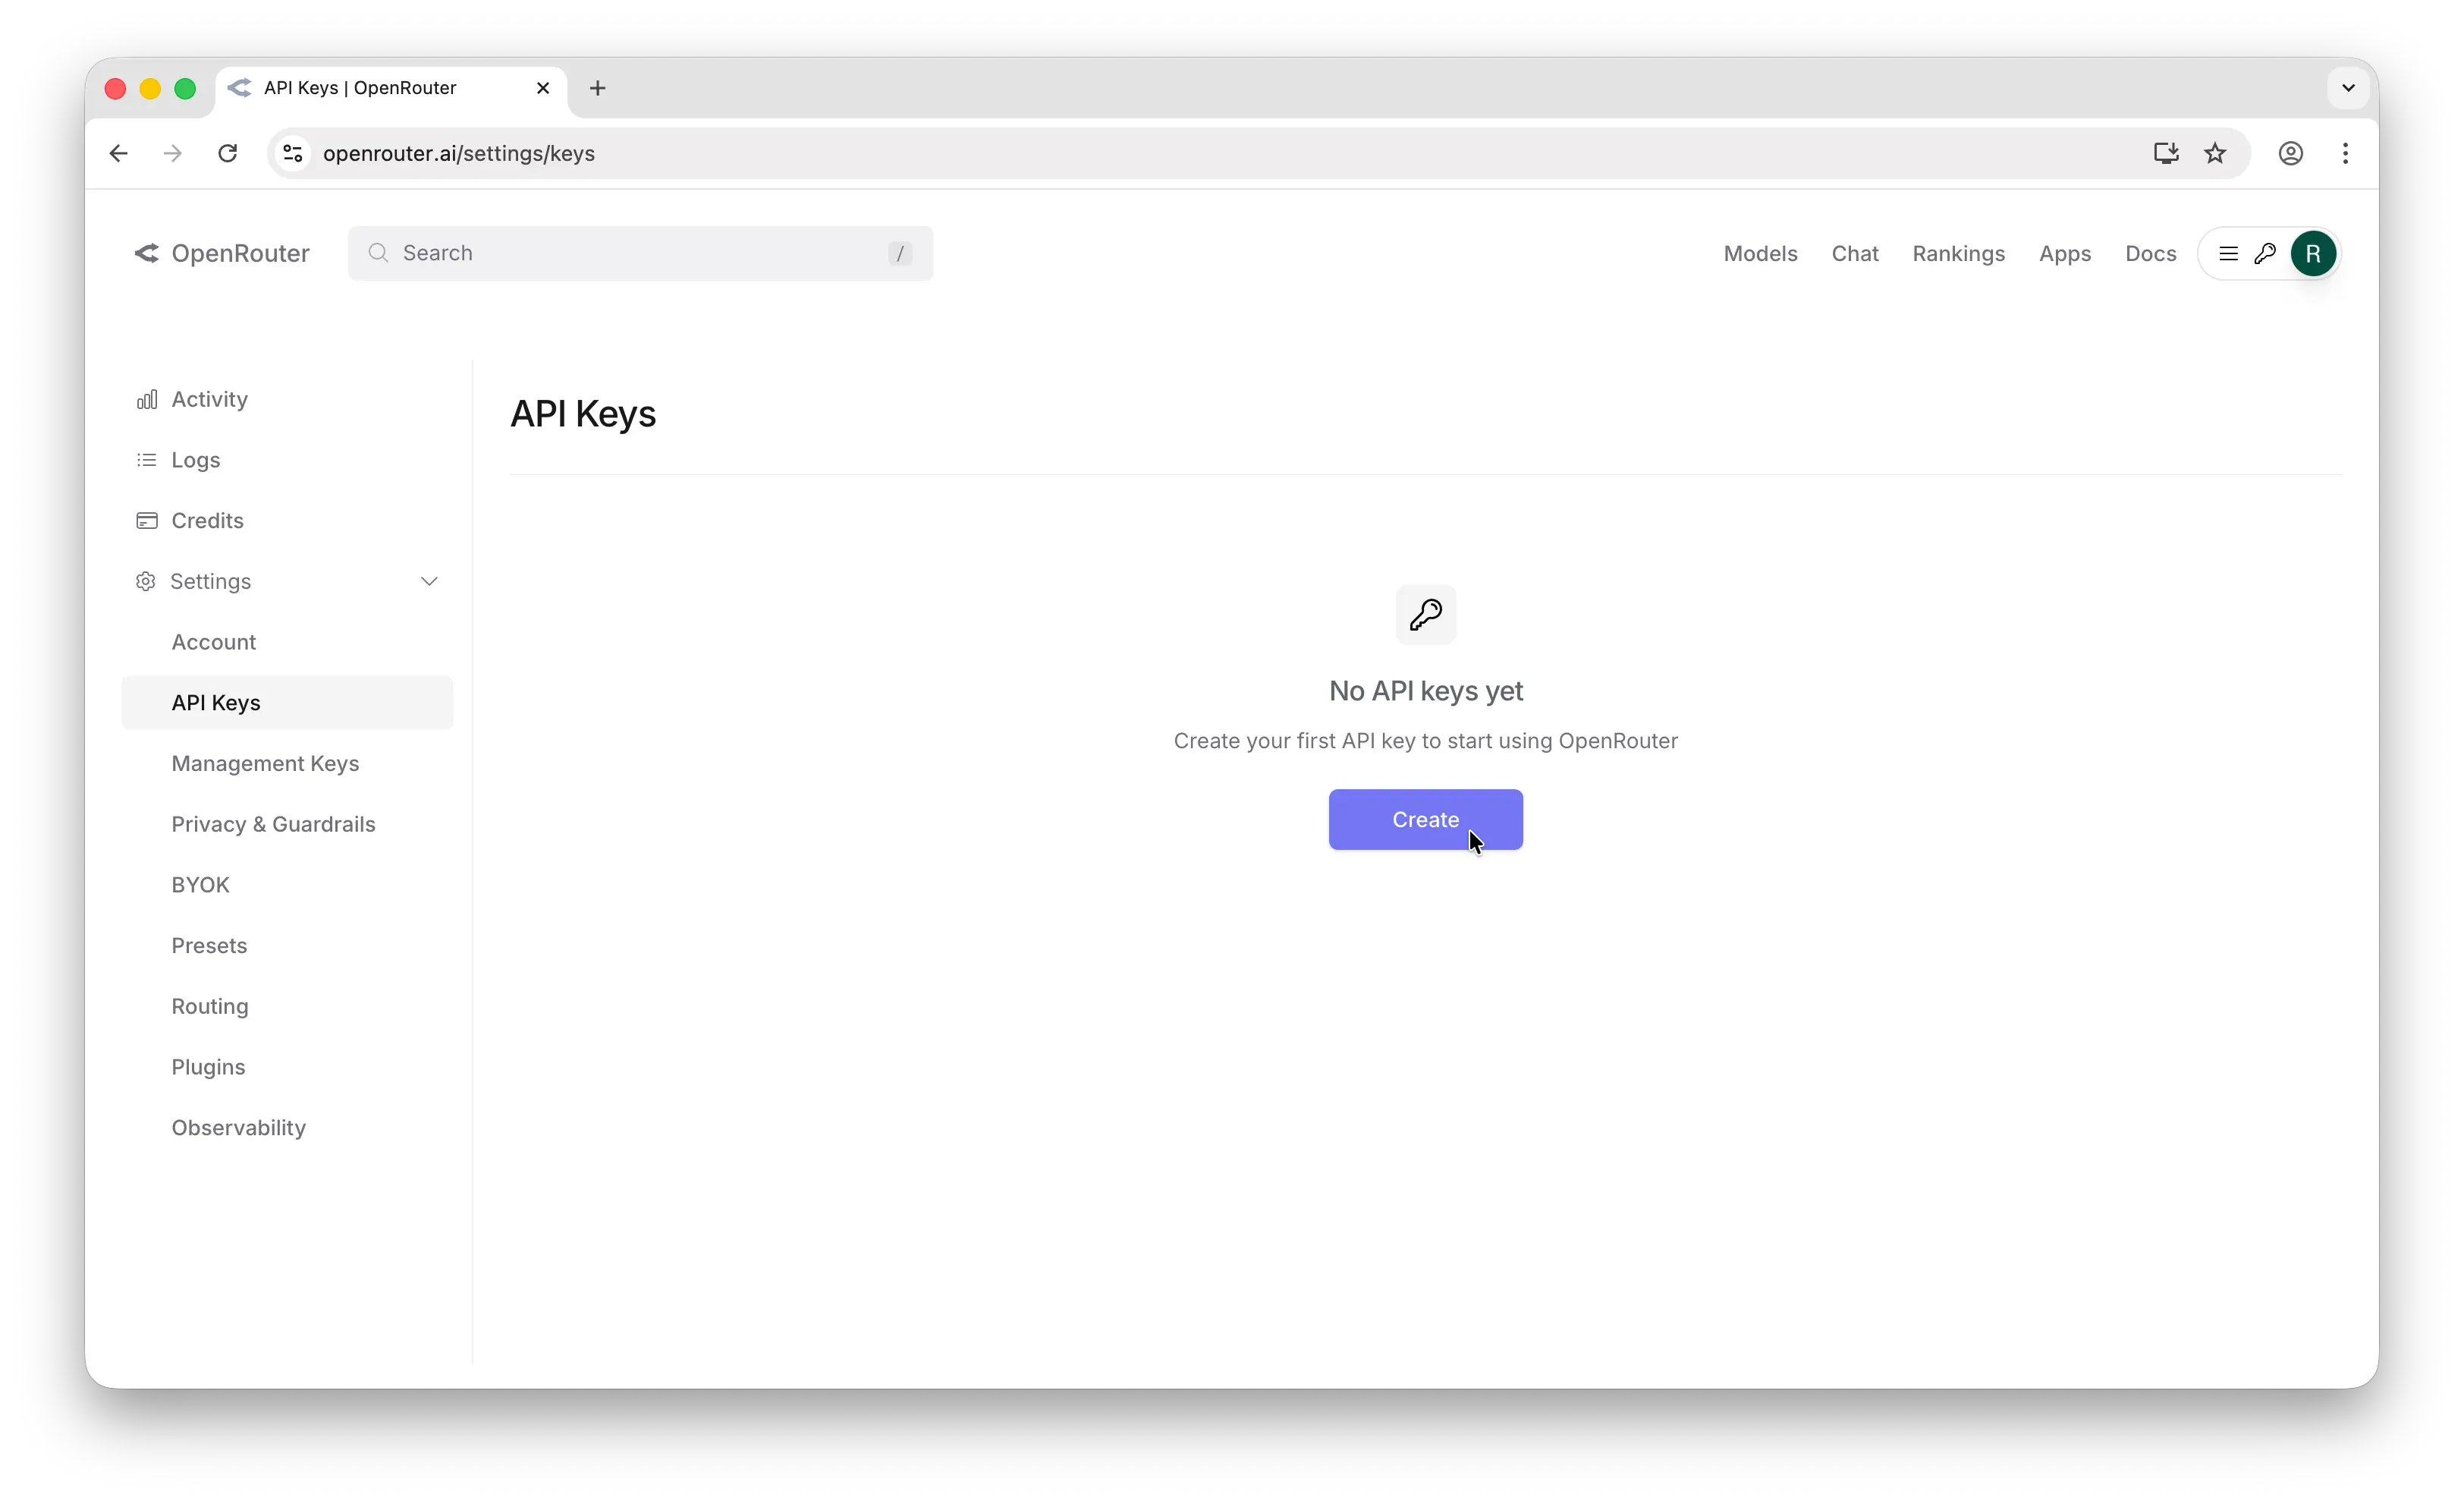
Step 2: Generate Your API Key
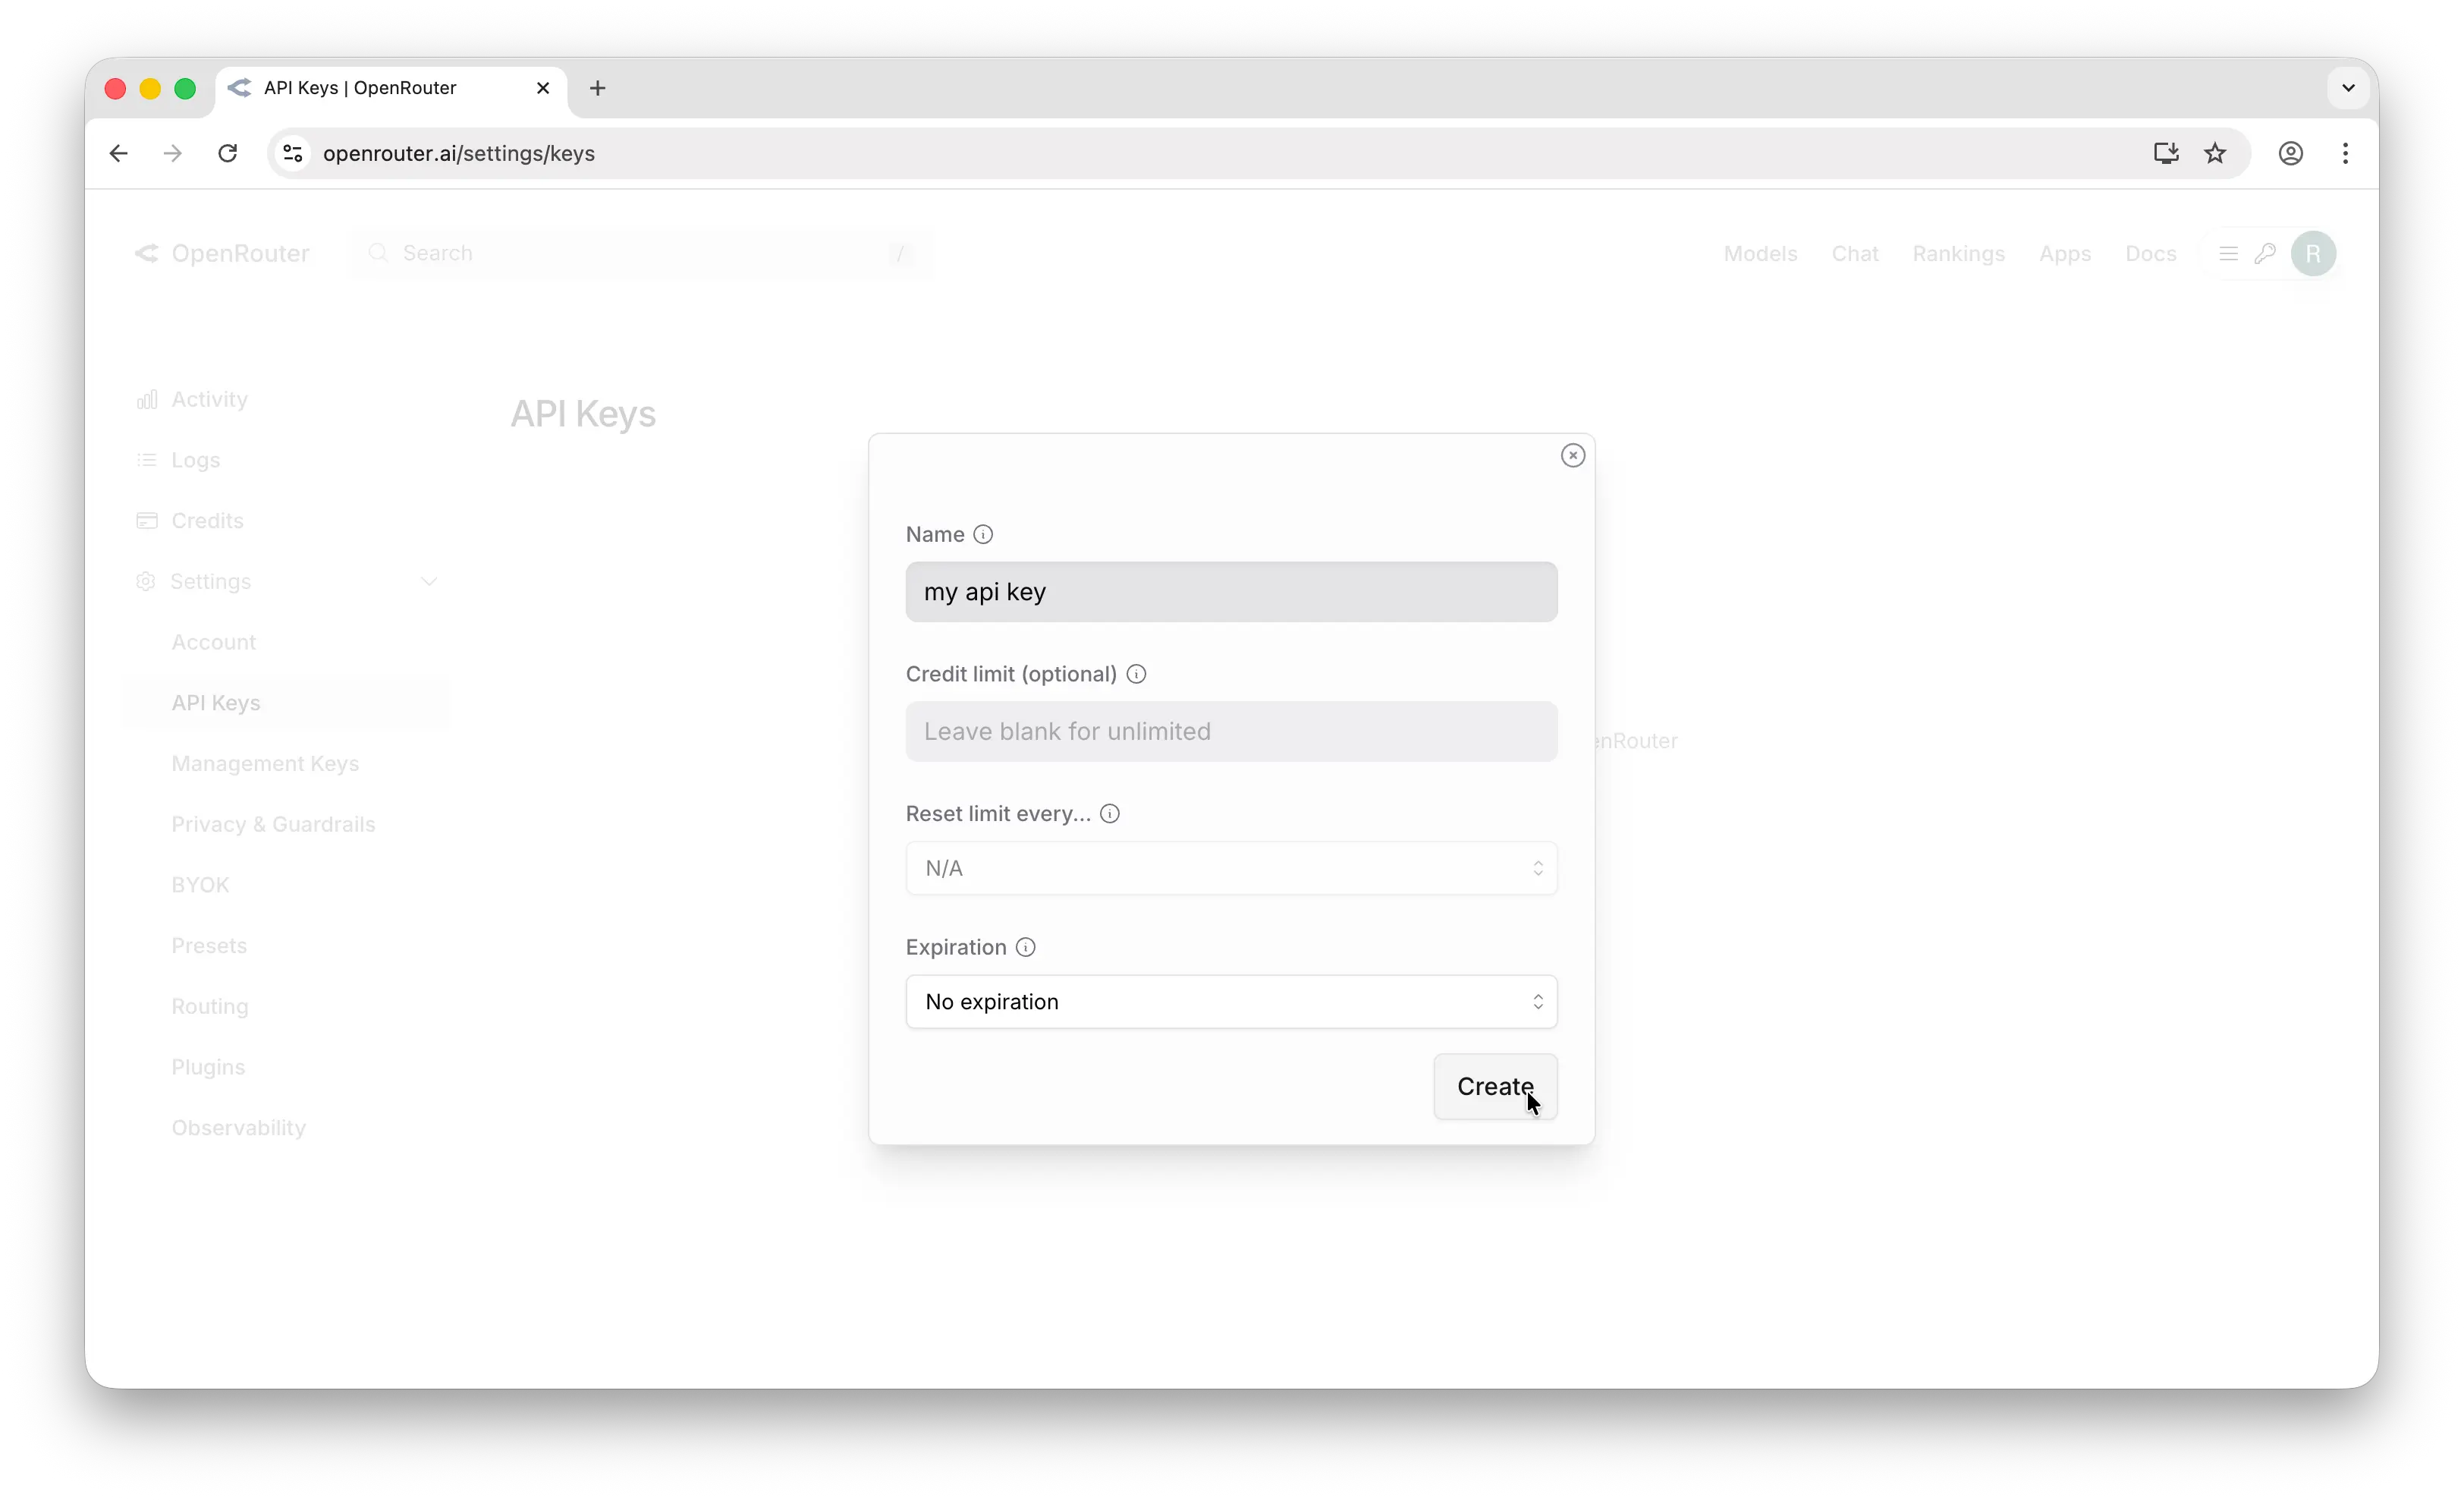
You'll land on the API key page. Click Create.
In the creation popup, you can configure:
- Name — give it something descriptive like
my-app-dev - Credit limit — set a spending cap for this key
- Reset limit — configure when the limit resets
- Expiration — set when the key expires
Important: Copy the key immediately after creation. OpenRouter only shows it once. If you lose it, you'll need to generate a new one.
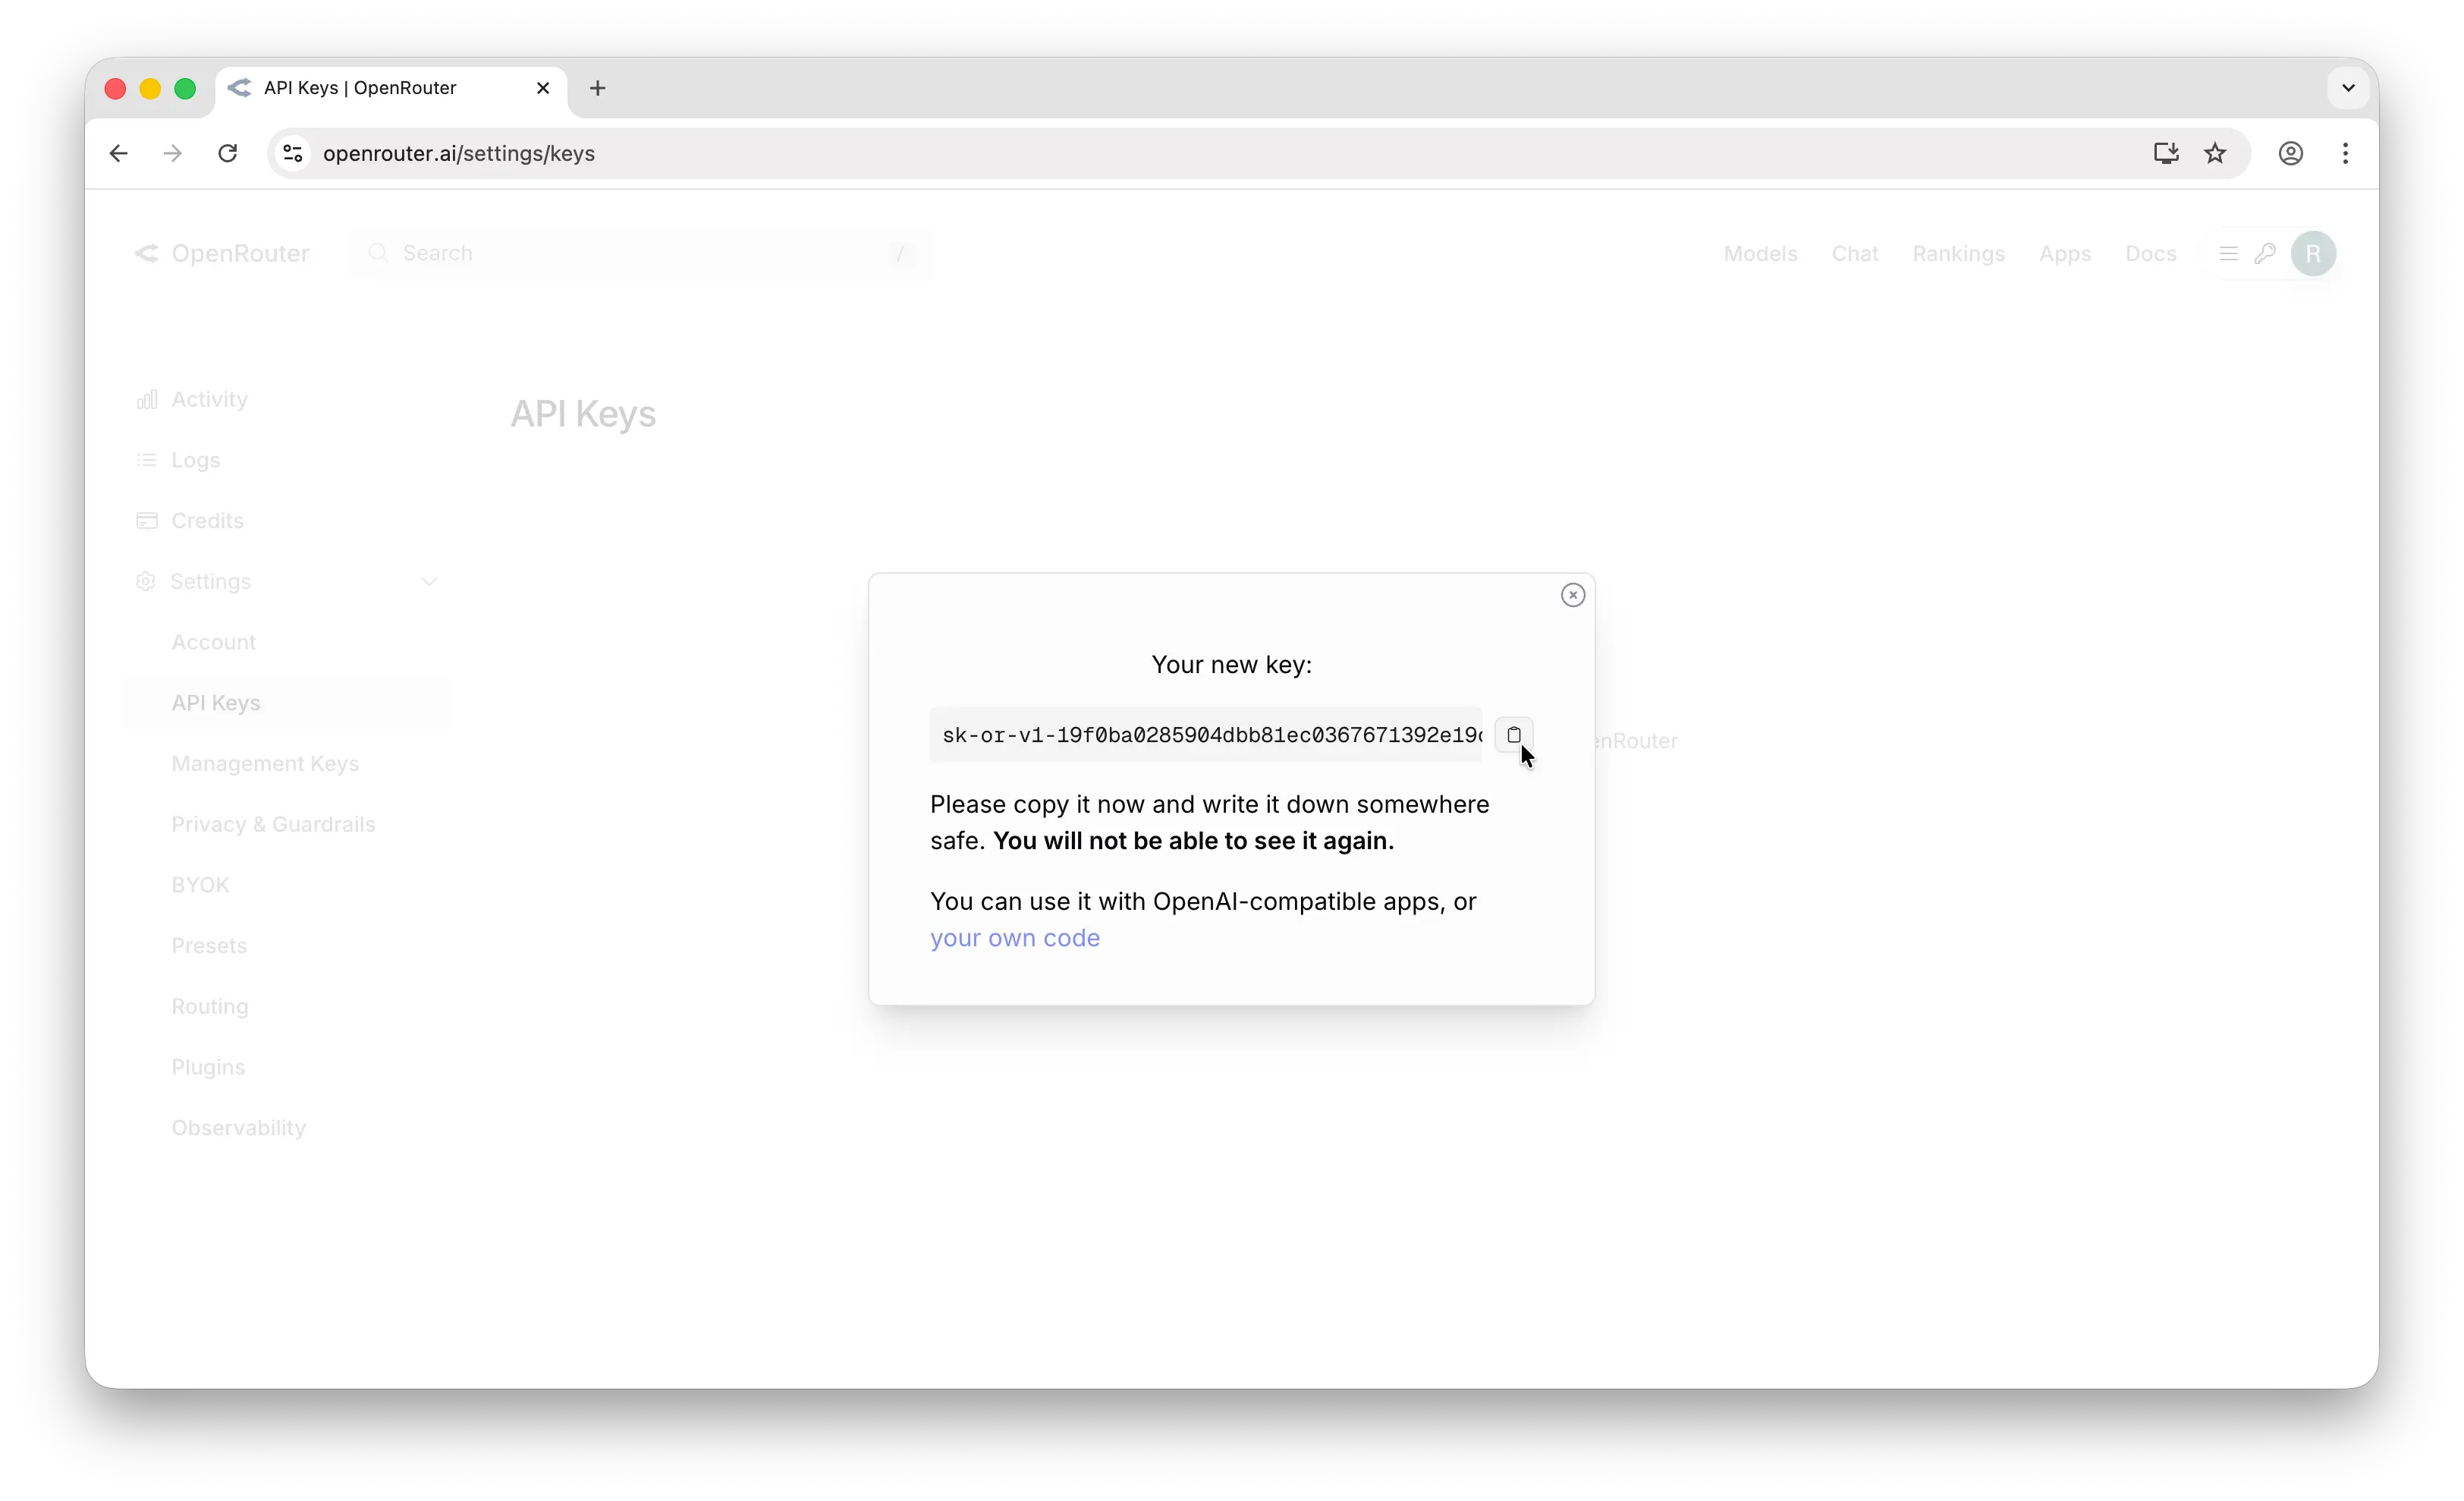
Store it somewhere safe — a password manager, an .env file, or your platform's secrets manager. Never commit API keys to a public repository.
Step 3: Make Your First API Call
Note: The OpenRouter SDK is currently in beta and may have breaking changes between versions. This tutorial uses version 0.9.11. We recommend pinning your dependency to this version until the SDK reaches a stable release.
Install the OpenRouter SDK:
npm install @openrouter/sdk@0.9.11
Then make a chat completion request:
import { OpenRouter } from "@openrouter/sdk";

const client = new OpenRouter({
  apiKey: process.env.OPENROUTER_API_KEY,
});

const response = await client.chat.send({
  chatGenerationParams: {
    model: "openai/gpt-5.4",
    messages: [{ role: "user", content: "Hello, world!" }],
  },
});

console.log(response.choices[0].message.content);
If you get a response back, everything is working. You can swap openai/gpt-5.4 for any model on OpenRouter's supported models page.
A Simpler Alternative with Puter.js
OpenRouter gives you one API key for hundreds of models — but you still need to manage billing, credit limits, and API keys yourself.
Puter.js offers a simpler approach with the User-Pays model: your app's users cover their own AI costs. You don't need an API key at all, and you pay nothing for AI usage no matter how many users you have.
Just add the Puter.js script tag and start chatting with any model:
<html>
<body>
    <script src="https://js.puter.com/v2/"></script>
    <script>
        puter.ai.chat("Hello, world!", { model: "gpt-5.4" })
            .then(response => {
                document.body.innerHTML = response;
            });
    </script>
</body>
</html>
No API key, no backend, no billing setup. The same puter.ai.chat() function gives you access to GPT, Claude, Gemini, Grok, Llama, and hundreds more models through a single interface.
Conclusion
You now know how to create an OpenRouter account, generate an API key, and make your first API call. For more details, check out OpenRouter's documentation. If you'd rather skip managing API keys and billing entirely, Puter.js gives you access to hundreds of AI models through a single JavaScript library with no API keys required.
Related
- Free, Unlimited OpenRouter API
- How to Use OpenRouter SDK with Puter
- How to Get an OpenAI API Key
- How to Get an Anthropic (Claude) API Key
- How to Get a Gemini API Key
- How to Get a Grok (xAI) API Key
- How to Get a DeepSeek API Key
- How to Get a Mistral API Key
- How to Get a MiniMax API Key
- How to Get a Moonshot AI (Kimi) API Key
- How to Get a Z.AI (GLM) API Key
- How to Get a FLUX (Black Forest Labs) API Key
- How to Get a Stability AI (Stable Diffusion) API Key
- How to Use OpenAI SDK with Puter
- Free, Unlimited OpenAI API
- Free, Unlimited Claude API
Free, Serverless AI and Cloud
Start creating powerful web applications with Puter.js in seconds!
Get Started Now