Connect to a WebDAV Server on macOS
On this page
In this tutorial, you'll learn how to connect to a WebDAV server on macOS. WebDAV lets you access files from a remote server as if they were local files on your Mac.
We'll use Puter's WebDAV server as an example, but these steps work with any WebDAV server.
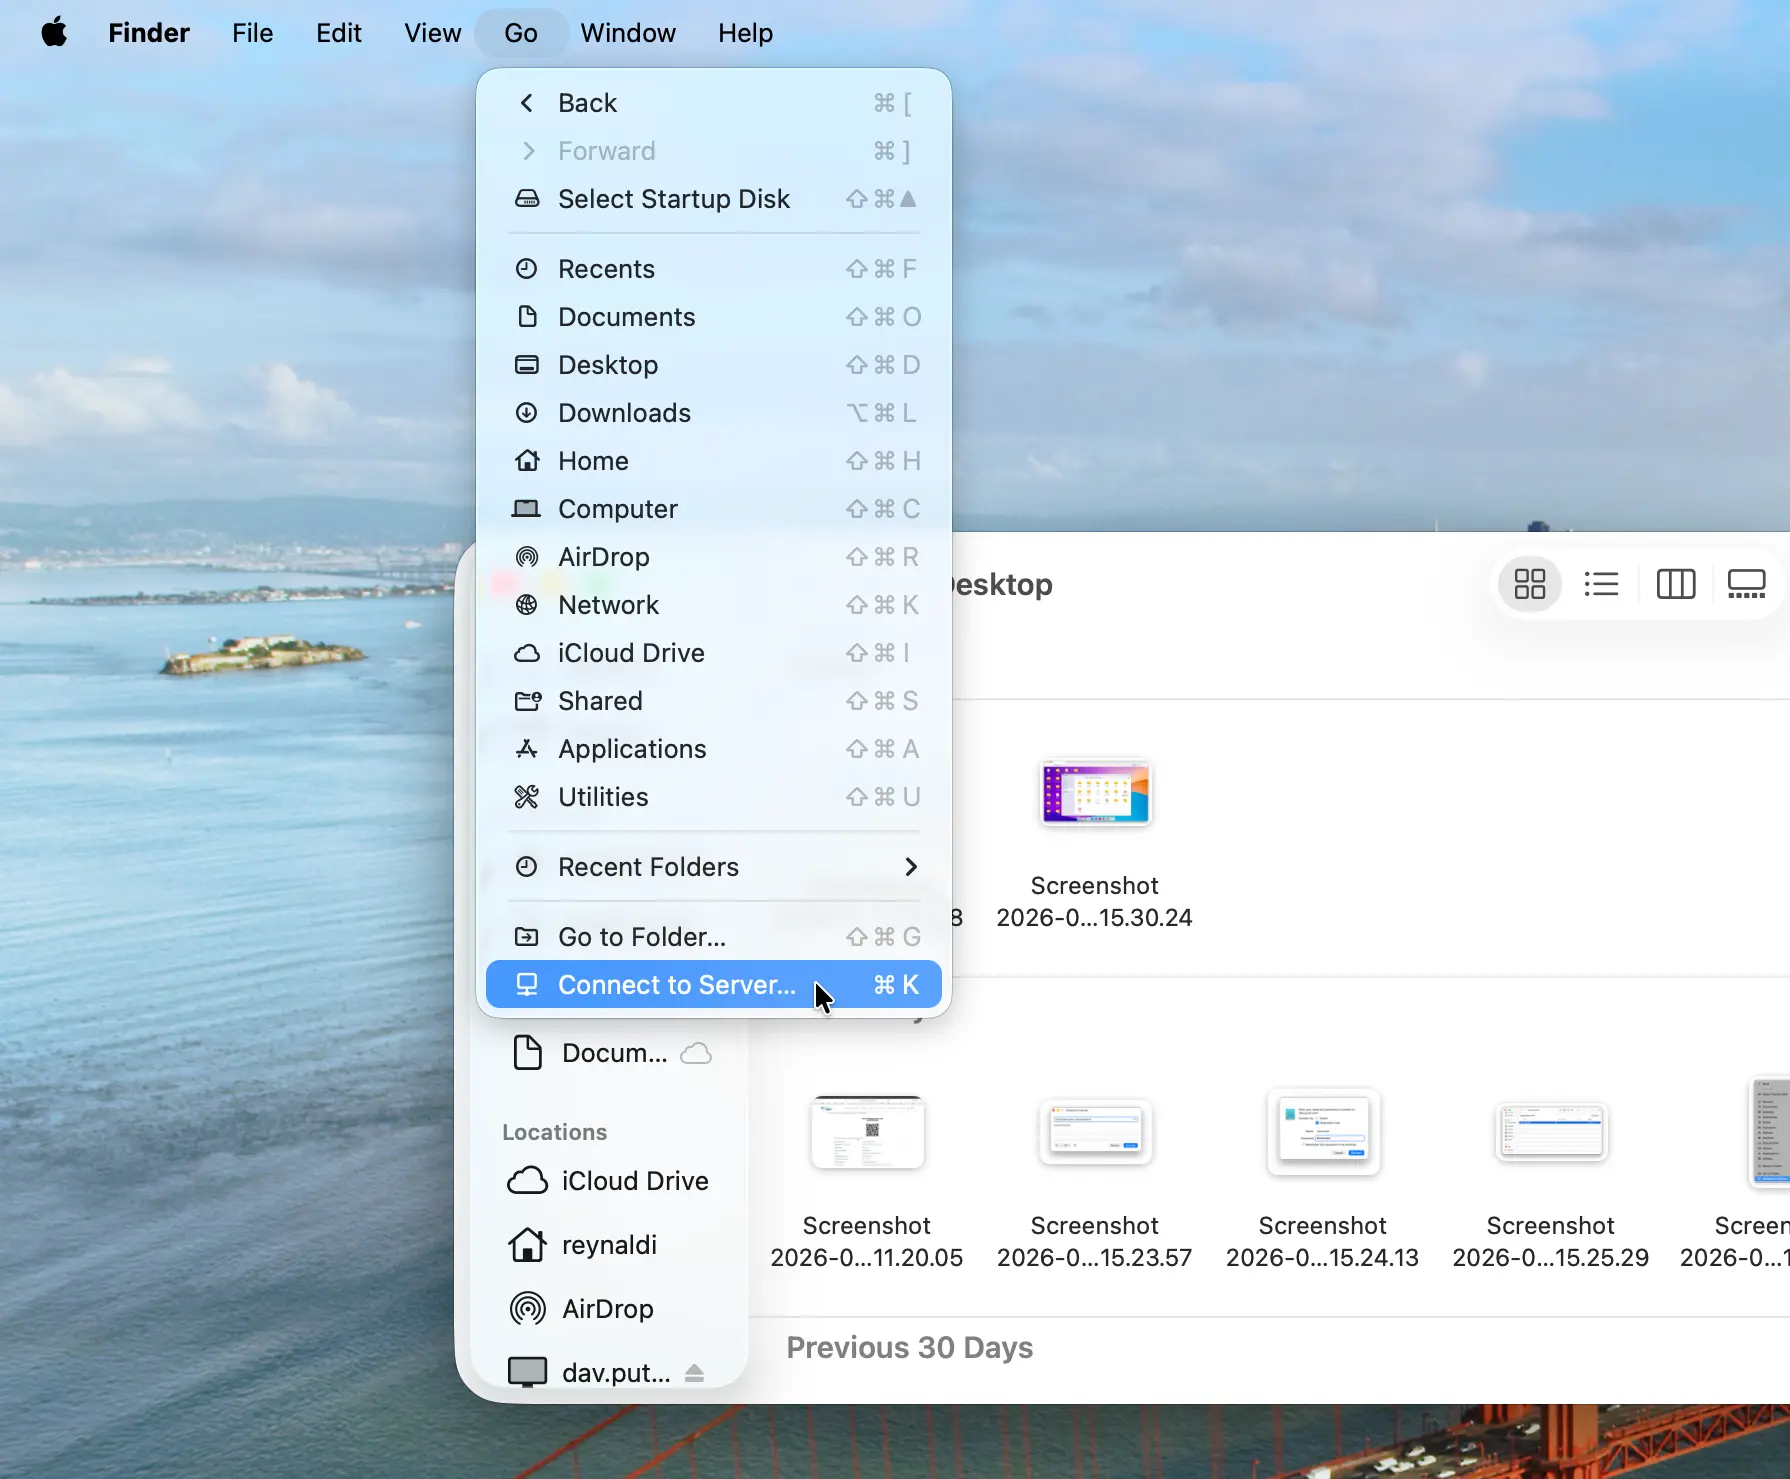
1. Open the Connect to Server Dialog
Open Finder, then from the menu bar select Go > Connect to Server (or press ⌘K).
2. Enter the WebDAV Server Address
In the dialog that appears, enter the URL of your WebDAV server and click Connect.
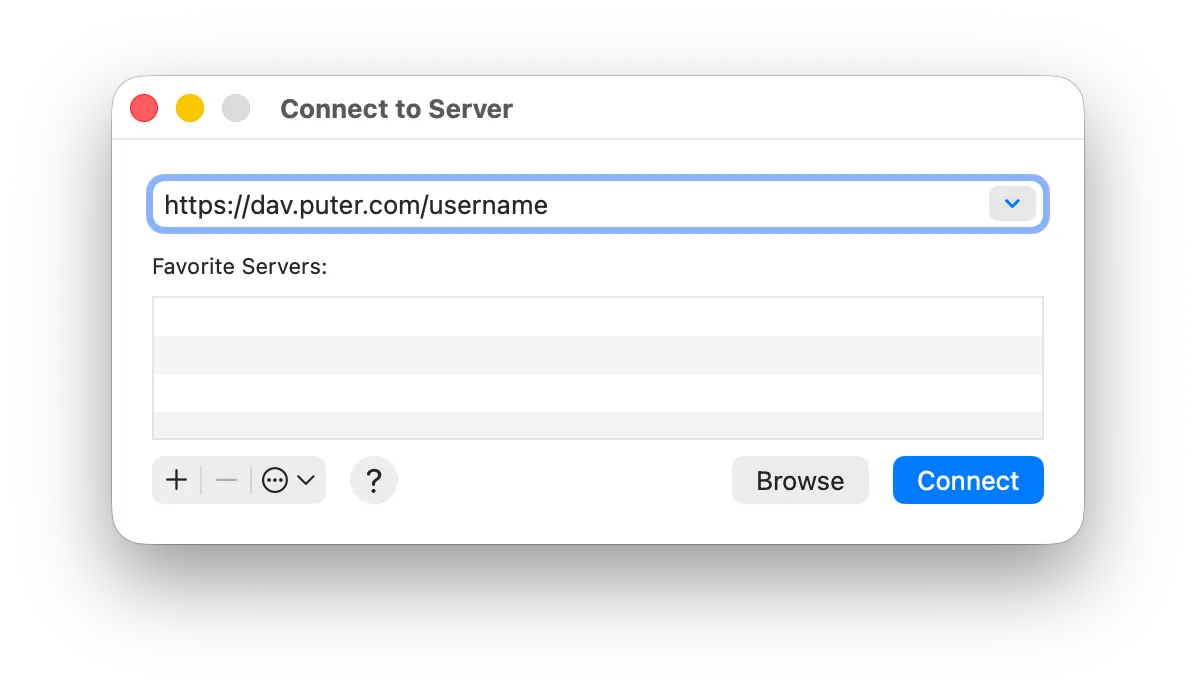
For Puter, use: https://dav.puter.com/<username> (replace <username> with your Puter username).
3. Enter Your Credentials
When prompted, enter your username and password, then click Connect.
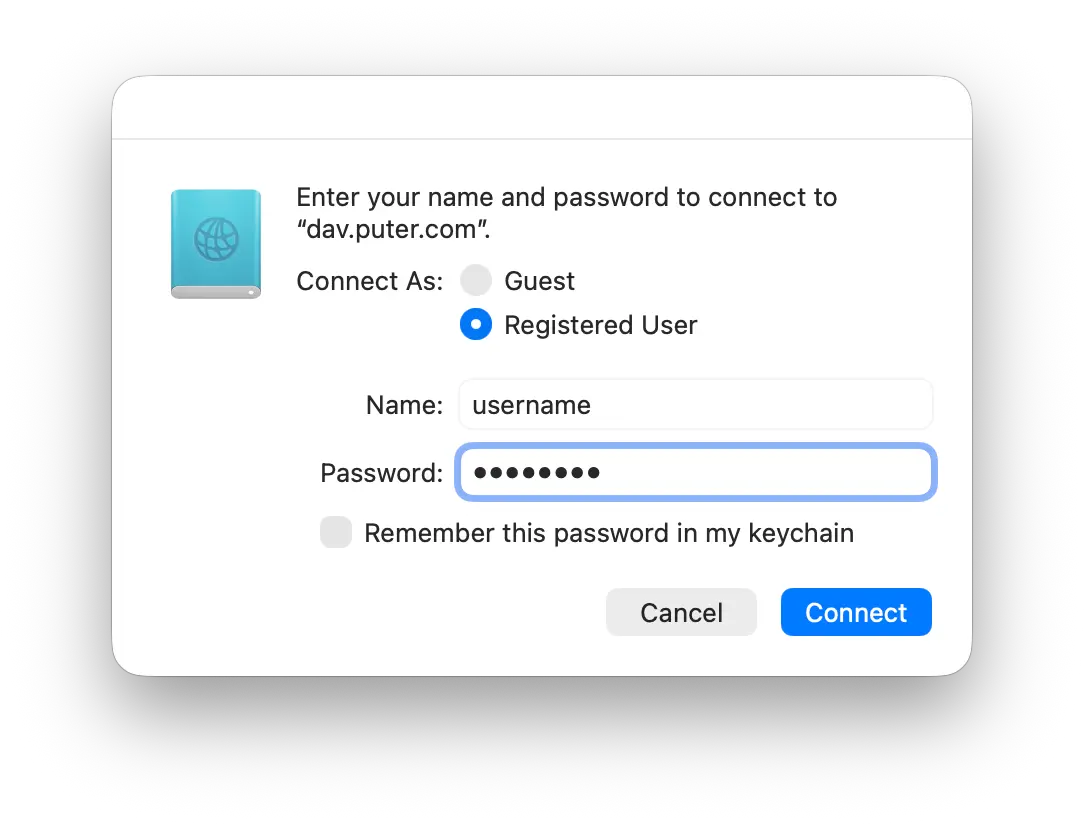
You can check Remember this password in my keychain to avoid entering it again.
Conclusion
That's it! You can now access your WebDAV files directly from Finder. Any changes you make sync automatically with the remote server.
Want your own cloud storage accessible via WebDAV? Create a free Puter account and connect using the steps above.
Related
Free, Serverless AI and Cloud
Start creating powerful web applications with Puter.js in seconds!
Get Started Now