How to Add File Upload to HTML (With a Working Demo)
On this page
In this tutorial, you'll learn how to add file upload to HTML: the form input, handling the backend side of the upload, and a full working demo at the end.
The HTML for a File Upload
To accept a file in HTML, the form needs three things: <input type="file">, method="post", and enctype="multipart/form-data".
<form action="/upload" method="post" enctype="multipart/form-data">
  <input type="file" name="file">
  <button type="submit">Upload</button>
</form>
Each piece has a specific role. method="post" is used because GET requests aren't suitable for binary data. enctype="multipart/form-data" tells the browser to send the file in a format that preserves its content. The name attribute on the input is the key the server uses to read the uploaded file.
The form above describes the markup, but the file still needs a destination at /upload. The next section covers how to set that up.
The HTML Form Attributes
The name attribute is required, and it's used to make sure the file is included in the form submission under a known key.
accept restricts the file picker to certain types. It accepts a comma-separated list of MIME types like accept="image/png,image/jpeg", extensions like accept=".pdf,.docx", or a wildcard like accept="image/*". It's a hint for the file picker rather than validation, so it's a good idea to also check the file type on the server.
multiple lets the user select more than one file at once.
capture opens the camera or microphone on mobile instead of the file gallery. Use capture="user" for the front camera or capture="environment" for the back. This is useful when you want to capture media directly from the device.
required prevents the form from submitting until a file is selected. disabled disables the input.
Pairing with label
Every file input should have a label. Labels help screen readers describe the input, and they expand the click target so users can tap a larger area. There are two common patterns:
<!-- Wrap pattern -->
<label>
  Pick a file
  <input type="file" name="file">
</label>

<!-- for/id pattern -->
<label for="upload">Pick a file</label>
<input id="upload" type="file" name="file">
Styling the File Input
The native "Choose File" button is hard to style directly because browsers limit how much of the input you can change. A common approach is to hide the input and style the label, which acts as the click target:
<label for="upload" class="upload-button">Choose a file</label>
<input id="upload" type="file" style="display: none">

<style>
  .upload-button {
    display: inline-block;
    padding: 8px 16px;
    background: #2563eb;
    color: white;
    border-radius: 6px;
    cursor: pointer;
  }
</style>
The same idea with Tailwind:
<label for="upload" class="inline-block px-4 py-2 bg-blue-600 text-white rounded cursor-pointer">Choose a file</label>
<input id="upload" type="file" class="hidden">
Common Gotchas
The value attribute on a file input appears as C:\fakepath\filename.ext in JavaScript, regardless of the operating system. This is a browser security feature that hides the user's real file path. To get the actual file, read inputElement.files[0] instead.
The accept attribute is a UI hint, not validation. A user can still pick or drop a file of any type, so it's a good practice to validate the type and size on the receiving end as well.
In React with controlled forms, file inputs don't reset between submits the way text inputs do. After an upload, you can clear the input by changing its key or by setting ref.current.value = "".
Actually Uploading the File
The HTML above sets up the form, but the file still needs somewhere to go. There are two common options: run a backend that accepts the upload, or use a service that handles storage for you. This article focuses on the second option, since the backend approach is well covered elsewhere.
The Backend Path
A backend that handles uploads receives the multipart payload, validates the size and type, stores the file on disk or in object storage, and serves it back through some URL. Common stacks for this include Node with multer, Python with Flask's request.files, and PHP's $_FILES. Beyond the initial setup, you also need to handle size limits, MIME validation, and storage as the app grows. If a backend works for your project, those libraries have good documentation. If you'd rather skip the server, the next section shows another approach.
Uploading with Puter.js
Puter.js provides cloud storage from the browser without a backend. Simply add the script tag, then call puter.fs.upload():
<input type="file" id="file">
<button id="upload">Upload</button>

<script src="https://js.puter.com/v2/"></script>
<script>
  document.getElementById('upload').onclick = async () => {
    const files = document.getElementById('file').files;
    const result = await puter.fs.upload(files);
    console.log('Uploaded to:', result.path);
  };
</script>
Storage, file handling, and availability are managed by Puter, and there are no API keys to set up. Puter uses a User-Pays Model, where each user signs in with their own Puter account and covers their own storage, so the app stays free for you to host.
The Complete Round-Trip Demo
Beyond uploading, a typical app also needs to list, preview, and delete files. The full loop fits in one HTML file:
<html>
<body>
  <input type="file" id="file">
  <button id="upload">Upload</button>
  <ul id="list"></ul>

  <script src="https://js.puter.com/v2/"></script>
  <script>
    const listEl = document.getElementById('list');

    async function refresh() {
      const items = await puter.fs.readdir('./').catch(() => []);
      listEl.innerHTML = items.map(item =>
        `<li data-path="${item.path}">${item.name}
          <button data-action="open">Open</button>
<html>
<body>
<input type="file" id="file">
<button id="upload">Upload</button>
<ul id="list"></ul>
<script src="https://js.puter.com/v2/"></script>
<script>
const listEl = document.getElementById('list');
async function refresh() {
const items = await puter.fs.readdir('./').catch(() => []);
listEl.innerHTML = items.map(item =>
`<li data-path="${item.path}">${item.name}
<button data-action="open">Open</button><html>
<body>
<input type="file" id="file">
<button id="upload">Upload</button>
<ul id="list"></ul>
<script src="https://js.puter.com/v2/"></script>
<script>
const listEl = document.getElementById('list');
async function refresh() {
const items = await puter.fs.readdir('./').catch(() => []);
listEl.innerHTML = items.map(item =>
`<li data-path="${item.path}">${item.name}
<button data-action="open">Open</button>
<button data-action="delete">Delete</button>
</li>`).join('');
}
listEl.onclick = async (e) => {
const path = e.target.closest('li')?.dataset.path;
if (!path) return;
if (e.target.dataset.action === 'open') {
const url = await puter.fs.getReadURL(path);
window.open(url);
} else if (e.target.dataset.action === 'delete') {
await puter.fs.delete(path);
refresh();
}
};
document.getElementById('upload').onclick = async () => {
const files = document.getElementById('file').files;
if (files.length) { await puter.fs.upload(files); refresh(); }
};
refresh();
</script>
</body>
</html>
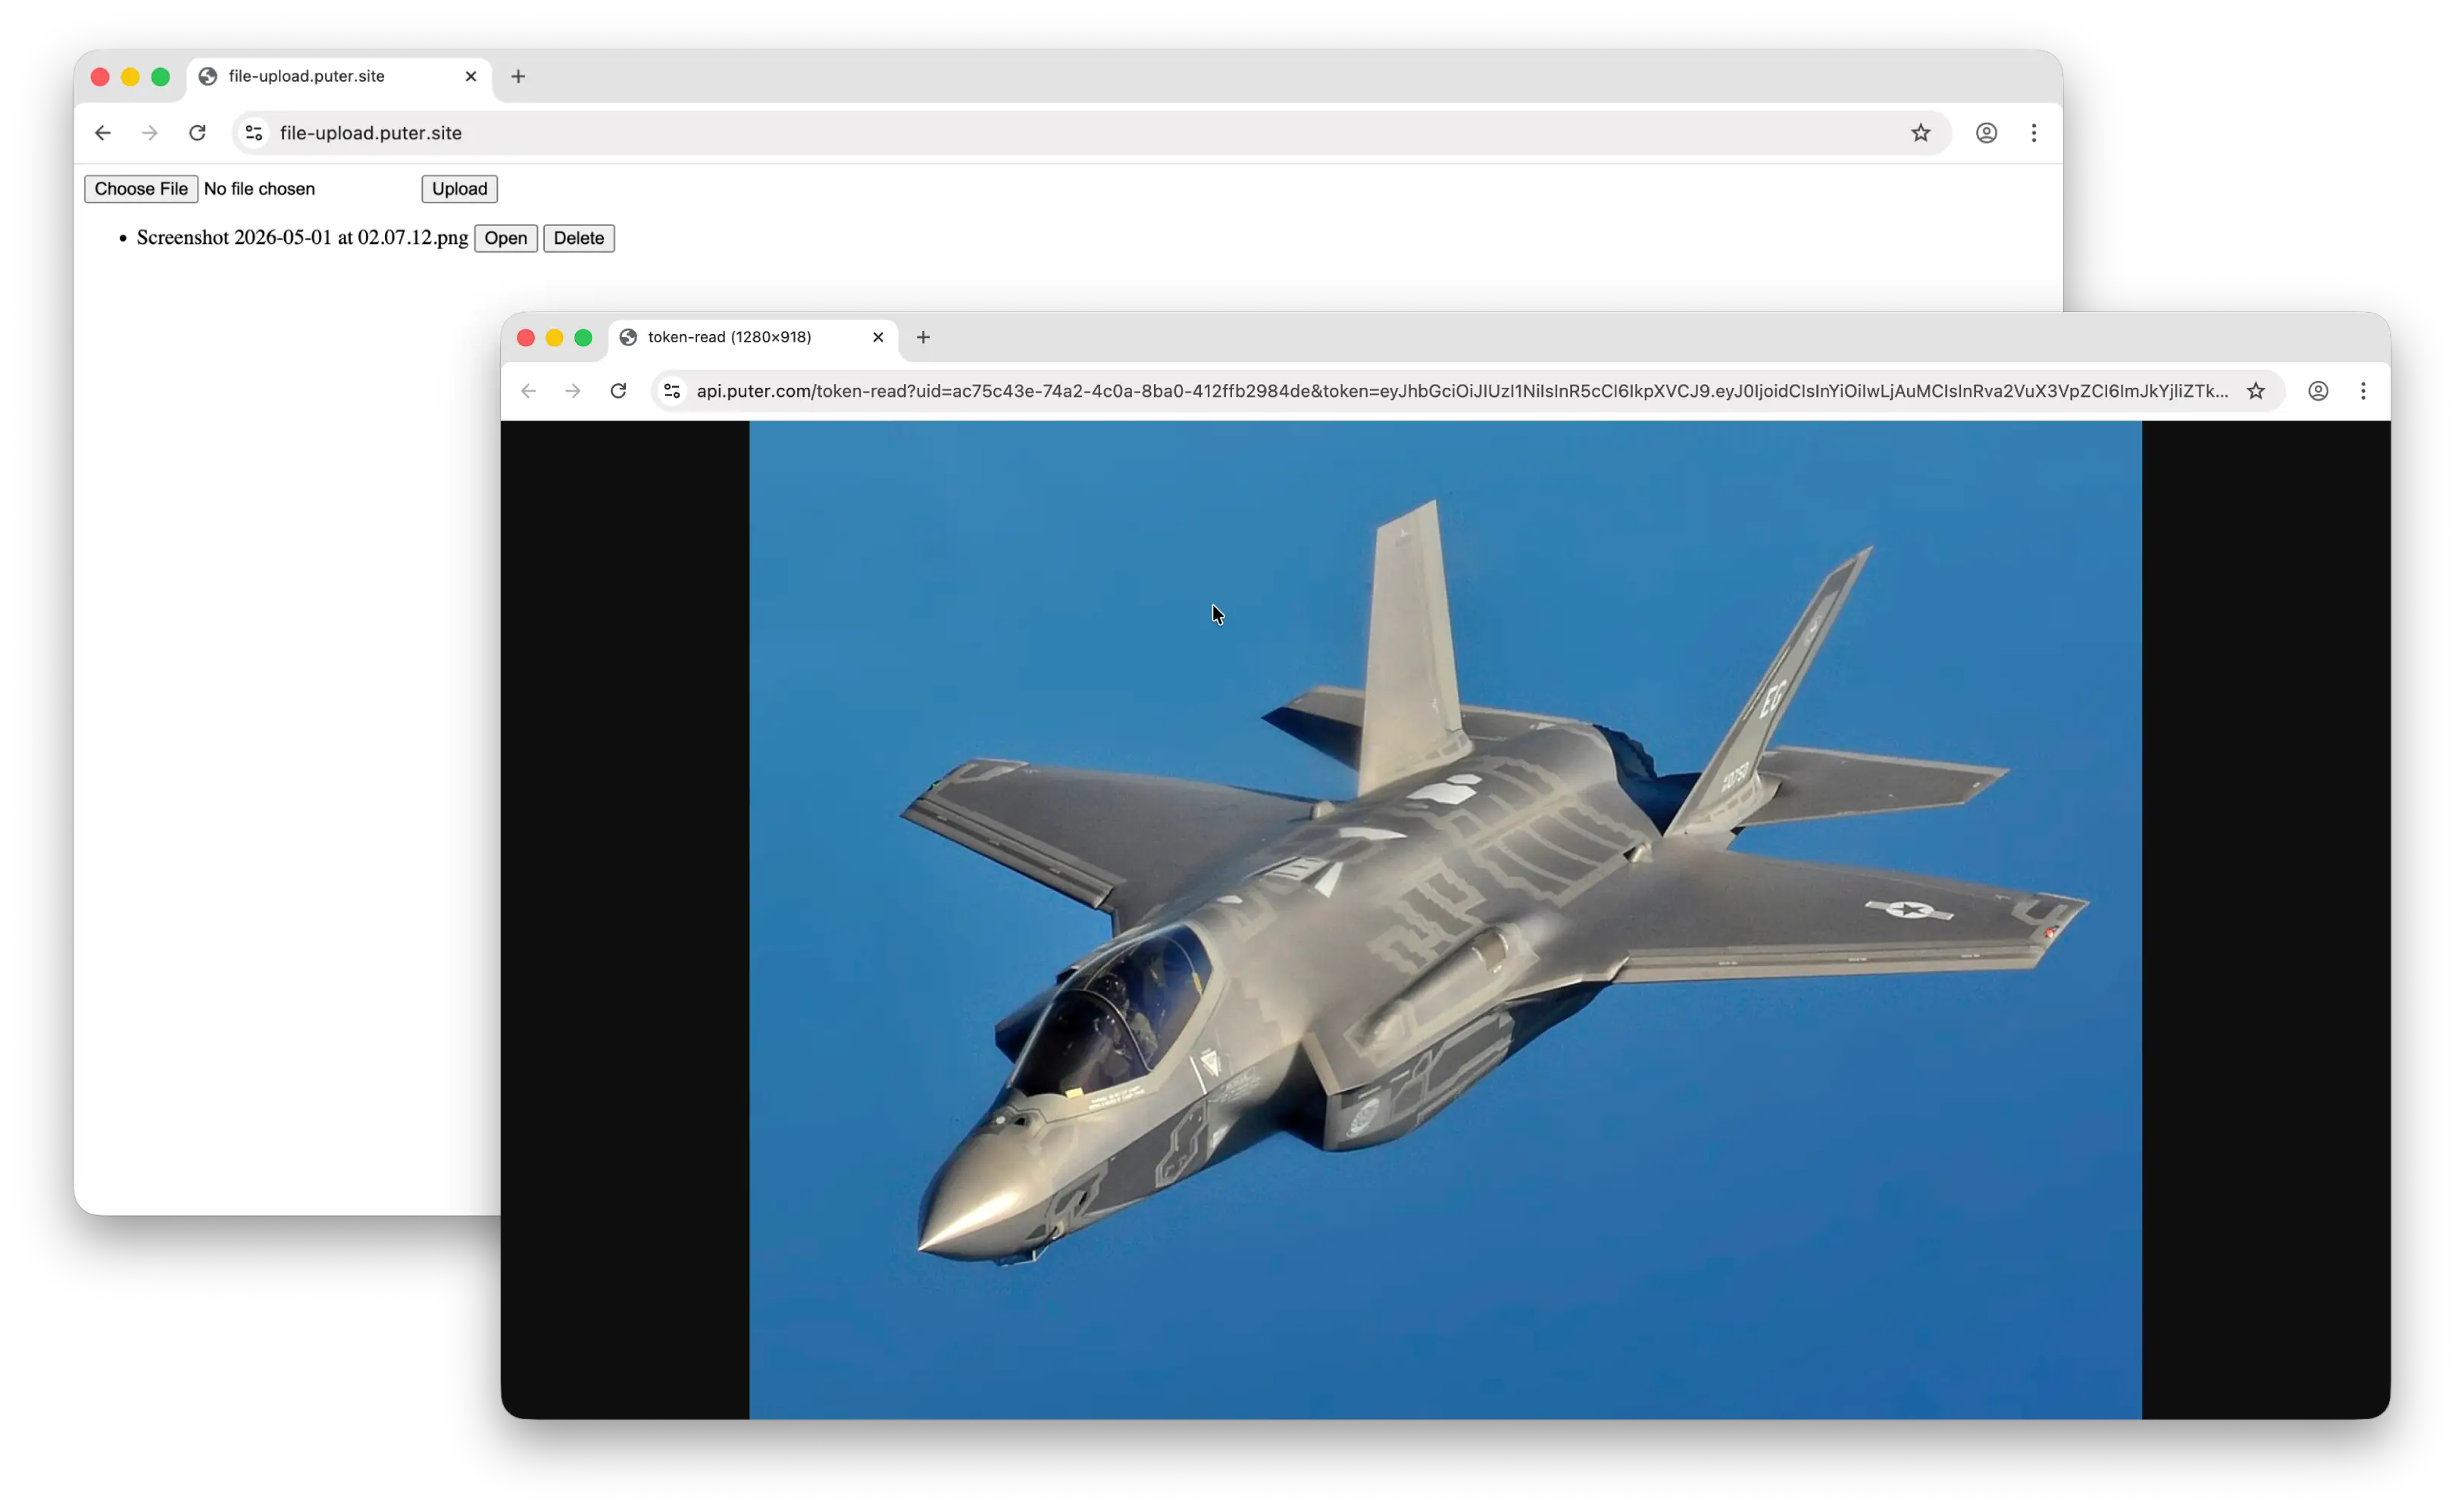
Save this as index.html and run it with an HTTP server. You can upload, list, preview, and delete files from a single page.
Or, you can try out the live demo at file-upload.puter.site.
Conclusion
In order to add file upload in HTML, you need the HTML code with a form, an input, and the appropriate attributes, plus a backend to accept the file.
If you'd rather not manage a backend, you can use Puter.js to handle storage directly from the browser. The demo above puts the full loop together: upload, list, preview, and delete in a single HTML file using puter.fs.upload, puter.fs.readdir, puter.fs.getReadURL, and puter.fs.delete. You can use it as a starting point and adjust the UI to fit your project.
Ready to add file upload to your own site? Drop the Puter.js script into your page and start using puter.fs.upload — no backend, no API keys, no setup.
Related
Free, Serverless AI and Cloud
Start creating powerful web applications with Puter.js in seconds!
Get Started Now